Post by nigel on Jul 3, 2007 20:27:30 GMT
Nigel’s
Eagle P21
Restoration Project
Phase 1
The Original Purchase
The car was purchased via eBay ‘One of those Mad Moments’ on the 4th February 2007 and collected it the following week. The car itself had 7 months MOT and 1 months Tax remaining, and was driven from the sellers address in Tamworth back home to North Wales ‘so far so good’.
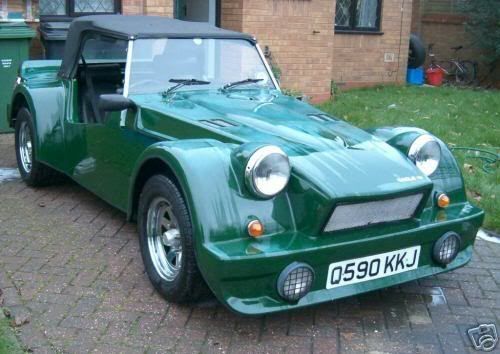
Pic. 1 - The First Picture of the Car ( having just been washed and still wet hides much of the UV bleaching)
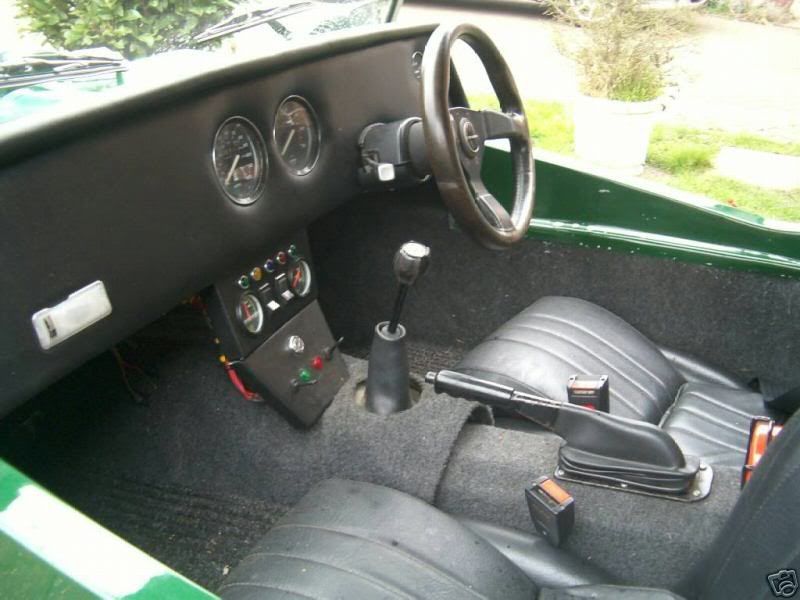
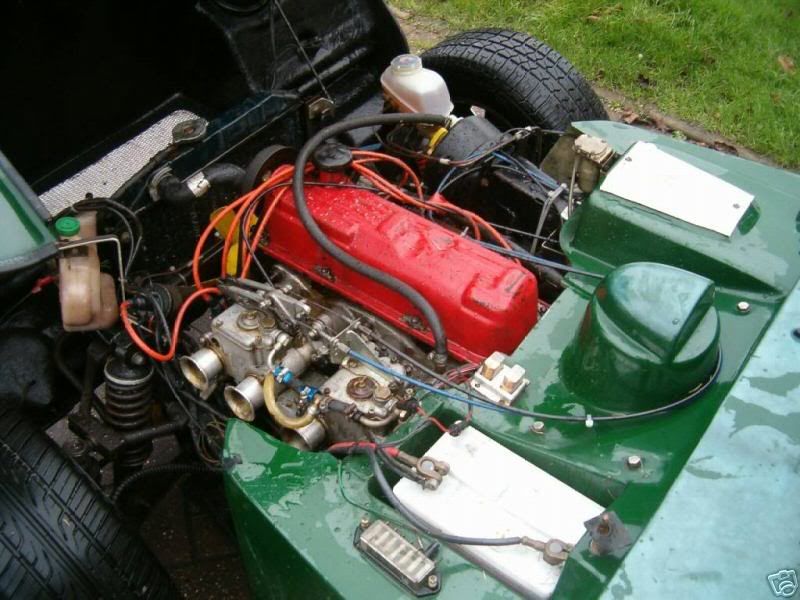
Pic. 2 & 3 The Cars interior and Engine bay look well laid out, even if starting to showing signs of neglect.
Get It Home and Start The Examination
The first task was to ascertain what had to be done. On purchasing the car a number of issues had been discussed with the previous owner as requiring attention, ground clearance - engine sump and exhaust system.


Pic. 4 & 5 - Interesting ground clearance ? I just wonder how long this will last - 35mm !
While the original electrical wiring looked good, some less than competent alterations / additions had been made which would require seeing to. Bodywork while solid had considerable UV bleaching and inevitable crazing, the chasse was starting to show the first signs of surface rust / paint flaking.
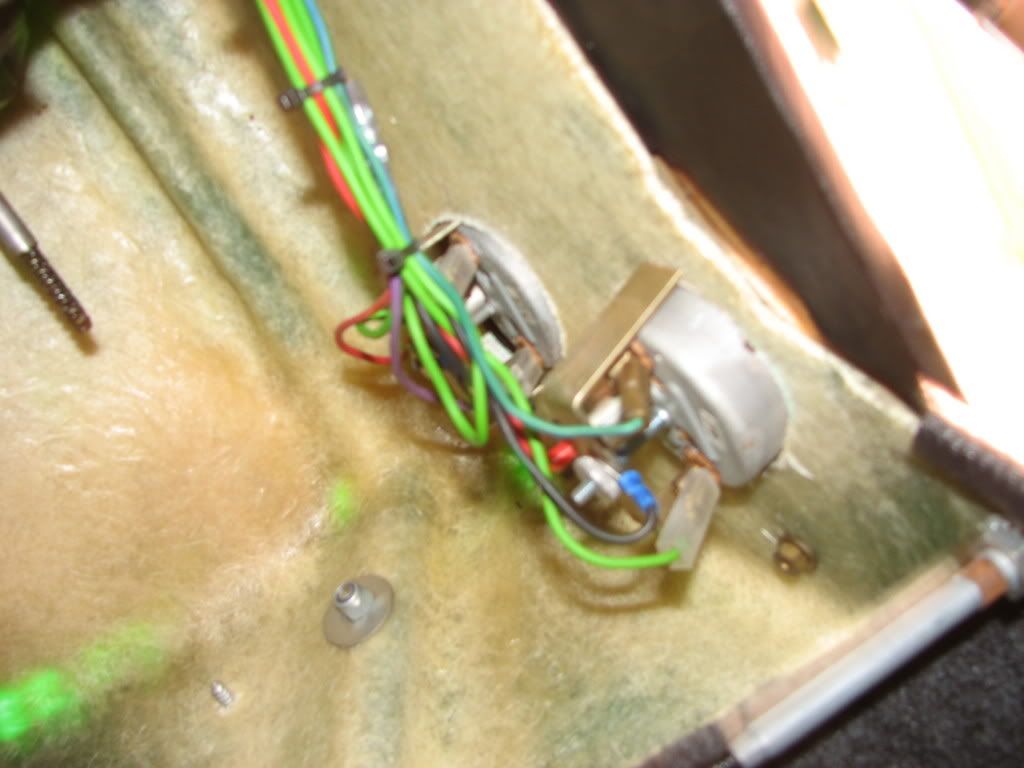

Pic. 6 & 7 - Much of the original wiring still looks to be good ( just wish I had a wiring diagram)
One of the four tyres was new and while the other three had plenty of tread left on them, age related signs of quite deep cracking had appeared. Various other age related issues were apparent, i.e. OHS front suspension rubber bushes would require replacement prior to attempting another MOT.
Time to Make a Start
Following much deliberation and a full weeks (evenings only) evaluation I decided to take the ‘bull by the horns’ so to speak and take the plunge. I knew that I would never be happy to live with such a restrictive ground clearance therefore a alloy RS2000 sump would be required, In order to fit this, it would necessitate the engine being removed. I decided therefore to take the car off the road throughout the month of march and pull the engine out for a sump change and general overhaul / refurbishment.
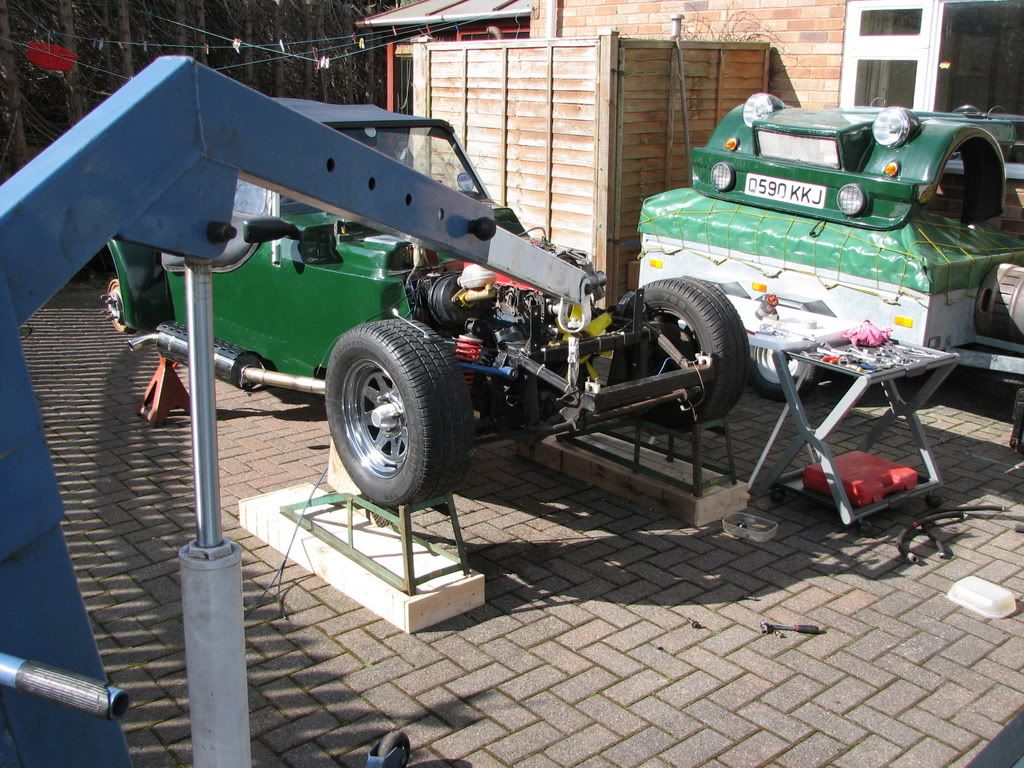

Pic. 8 & 9 - Car ready for engine and gear box removal - Its out and ready for modification
The Engine has had a general overhaul apart from the sump change I.e. gaskets, belts, rubbers etc Clutch checked, big end bearings, oil pump etc etc etc all found to be ok. Decided not to break the head as following inspection via inlet/exhaust apertures looked Ok. Inlet and exhaust valve clearances reset and interestingly found that at some stage the engine had been fitted with a Piper reground Camtec fast road cam BP270. While the engine and gearbox were out it provided me the opportunity to inspect and refurbish not only the engine ancillaries, but also de rust and recoat the chasses, I decided a couple of coats of black hammerite metal paint would do the job.
Now my attentions turned to rectifying my exhaust problem. I was lucky enough to source a second hand 2001 Westfield zetec stainless side pipe with heat guard. The car was already fitted with a serria 4 into 2 cast manifold which I decided to keep in order to keep cost down, and with the help of some Jetex pipe fittings for approximately £100 in total ‘I had a side exhaust system‘.


Pic. 10 & 11 - Side Pipe fitted but now requires polishing - Simple tidy engine bay pipe run (yes I know, it’s a refurbished RS2000 sump, that’s why its wielded)
Now having resolved the ground clearance issue and got a nice looking side mounted exhaust pipe in the process, my attentions turned to finishing off the engine bay, as a previous owner had at some stage painted much of the engine my good lady encouraged me to freshen up the colour scheme. What the lady wants the lady gets. So even the engine got painted.

Pic. 12 - The finished engine bay in all its glory (my god that was a lot of work for something that spends most of its time hidden)
Well its now back in and following a full carburettor strip down, new seals / gaskets, jet clean, floats etc its running again. I have to confess having done a degree of work on the engine during removal, I did run the engine prior to refurbishing the carburettor. I suppose with age, a degree of caution creeps in.
Now fit the refurbished, polished wheels, tread with new soft track day ’road legal’ tyres and were off to do a shake down. ‘The smell of drying heat resistant paint is terrible’ anyway short trips with plenty of tools are the order of the day. After 20 miles or so and a visit to the garage for tyre pressure and wheel tighten check the general clutch and throttle adjustment are on the list. Due to the engine position change the gear stick is now fouling on the hand break lever and the general driving position needs addressing. But overall no major problems, and to cap it all the ground clearance has now been raised from 1.25 inches to a very respectful 4 inches, and the new side pipe looks and sounds great.
Well its now the Easter bank holiday and what a glorious weekend it is, unfortunately the only downside to this, from the restoration point of view, is that its to good a weather not to be out driving and enjoying the car so I’m afraid that not that much is going to truly get done, as I had planned to strip out the interior and dash and proceed on the bases of minimalism, ’if not required get rid of as just more to go wrong’
Now ! This has been a weekend to remember the interior still needs doing, the list of work is as ever daunting, ‘will there ever be any light at the end of this tunnel’ the interior needed finishing ( wiring, carpeting layout ) the boot wiring I had not even started, and to top it all during the shake down runs I have developed a oil leak from the auxiliary drive shaft, trust this to be the one of the only seals I did not change while having the engine out.
Time to stop moaning and get on with the job. First strip the dash, remove the centre console, very 80’s, half the lights and dials aren’t connected anyway. Reposition ignition key, hazard light switch and make sure every thing works and is cleanly wired. While I was busy working upside down on my back with my head under the dash, the good lady had been busy on the sewing machine hemming a new set of foot well and tunnel carpets.
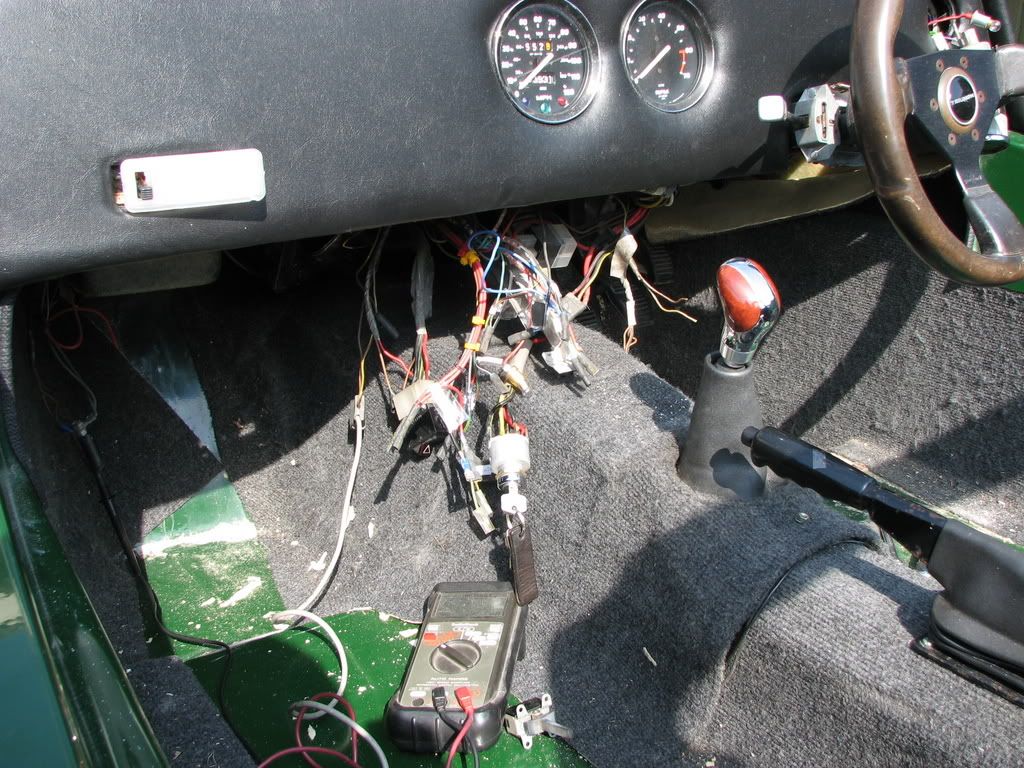

Pic. - 13 & 14 The during rip out and the finished article
The dash was now starting to take shape, and the space gained from removing the centre console could now be used to fit a Radio/CD player (even if you can’t here it its always great to have some music, especially a problem for the driver of a pinto with a side pipe).
For a change its all going to plan Saturday sees the majority of the interior completed, leaving Sunday free to tackle the problem of the oil leak and cleanup the boot electrics including the fitment of a inertia switch for the electric fuel pump (safety first), curtsey of the local scrap yard for a fiver. One last luxury was the fitment of a ‘bran new’ Aldon Ignitor electronic ignition unit. I was persuaded to make the investment as not only were my distributor lobs badly warn from the continual changing of points, but from a economy and tune stability point of view. What’s the point of paying to have the car tuned / set up for it to fallout a week later.
Saturday the 21st May 10.15am and ‘judgement day‘. The car is booked in to A. B. Garage in Chester to be rolling road tuned / setup and while I have been looking forward to the day for some time I must confess to being somewhat apprehensive ‘what if the engine goes pop’

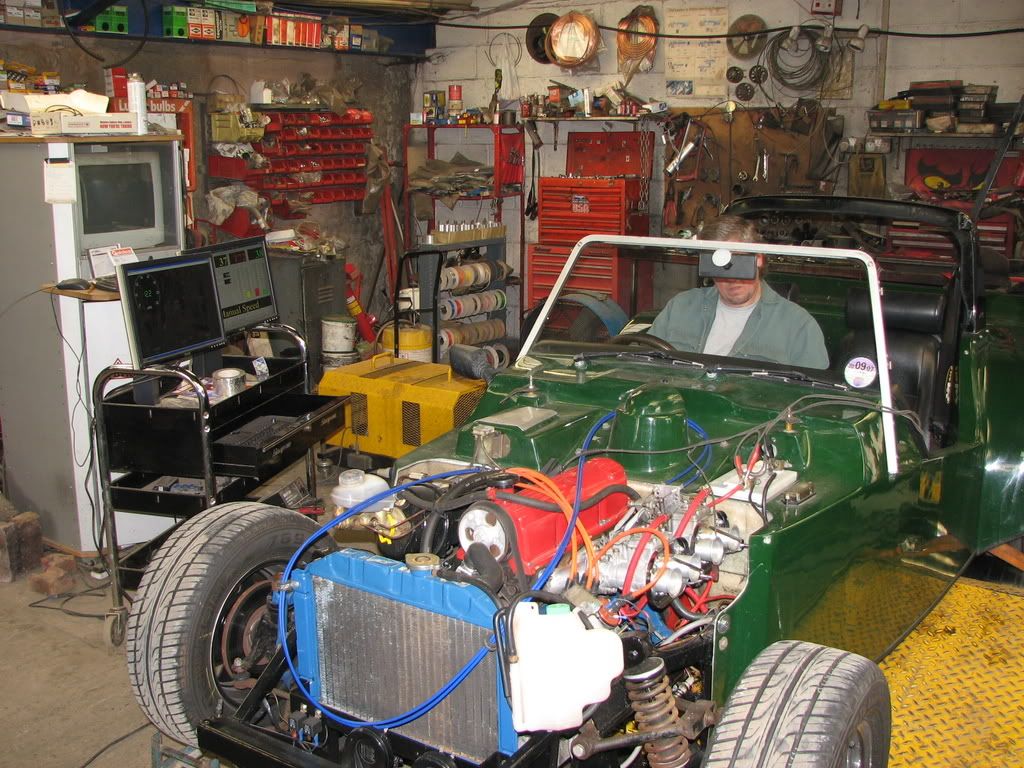
Pic. 15 & 16 - In to the Lions Den and The Day of Reckoning
Well the experience was certainly one of which will stay with me for many a year to come. A.B. Garage had been recommended to me by the owner of Chester Sports Cars - ‘Tiger Kit Car Specialists’ and while initially, primarily based on the look of the place, I questioned weather I had made a mistake. I was soon put at ease, it was very much like going back in time, before all the politically correct health and safety do-gooders had take over. It quickly became apparent that these two individuals had not only all the necessary tools and equipment but without doubt the knowledge skills and passion to build, modify and tune competitive racing cars.
My confidence on a high, throughout the 4 hour test, I was allowed to participate very much as a student through every step of the process, this in itself I would have paid for.
Due to the age of the engine and that I intended its use to be road rather than track (poss. a bit of hill climb) we keep the RPM below 6000 and went about producing a drivable sports car. Along the way there were one or two apprehensive moments and apart from some high quality leads and replacement jets the job was done with no major problems, and I left clutching the evidence of our labours in the form of an A4 piece of paper depicting a BHP and LB FT profiles, and a far smoother and livelier car to boot. (‘that Subaru driver didn’t know what hit him on the way home’)
This will have to do for Phase 1 of the Restoration as its time to get it to Stoneleigh
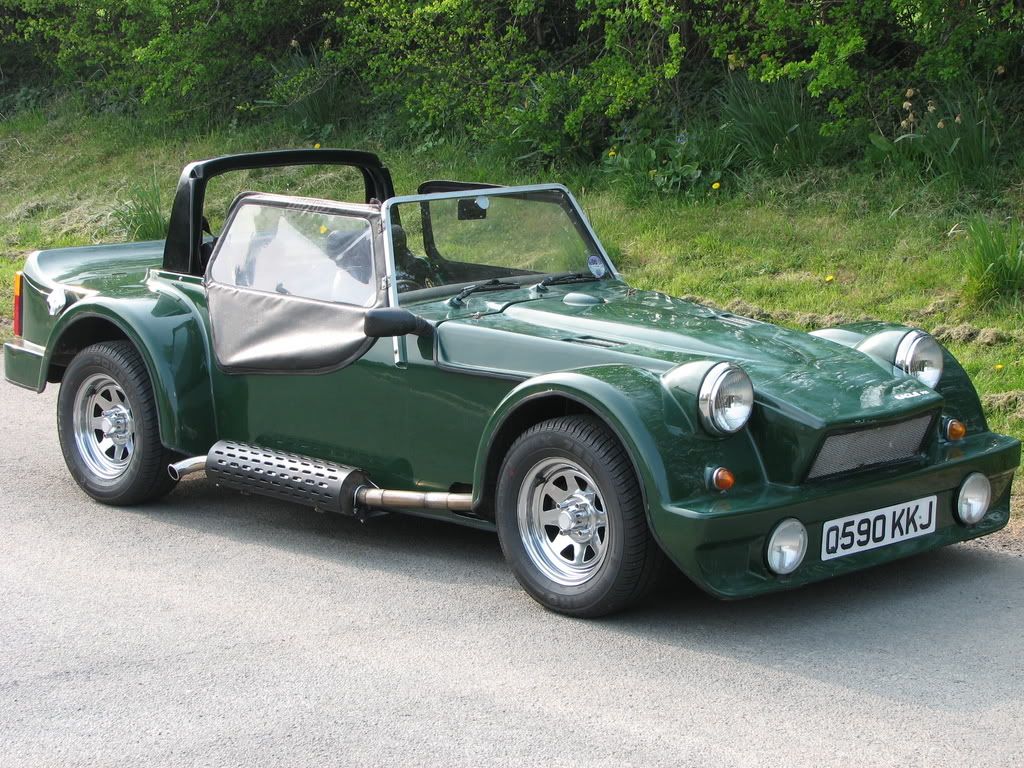
The Car so far in all its glory
Eagle P21
Restoration Project
Phase 1
The Original Purchase
The car was purchased via eBay ‘One of those Mad Moments’ on the 4th February 2007 and collected it the following week. The car itself had 7 months MOT and 1 months Tax remaining, and was driven from the sellers address in Tamworth back home to North Wales ‘so far so good’.

Pic. 1 - The First Picture of the Car ( having just been washed and still wet hides much of the UV bleaching)


Pic. 2 & 3 The Cars interior and Engine bay look well laid out, even if starting to showing signs of neglect.
Get It Home and Start The Examination
The first task was to ascertain what had to be done. On purchasing the car a number of issues had been discussed with the previous owner as requiring attention, ground clearance - engine sump and exhaust system.


Pic. 4 & 5 - Interesting ground clearance ? I just wonder how long this will last - 35mm !
While the original electrical wiring looked good, some less than competent alterations / additions had been made which would require seeing to. Bodywork while solid had considerable UV bleaching and inevitable crazing, the chasse was starting to show the first signs of surface rust / paint flaking.


Pic. 6 & 7 - Much of the original wiring still looks to be good ( just wish I had a wiring diagram)
One of the four tyres was new and while the other three had plenty of tread left on them, age related signs of quite deep cracking had appeared. Various other age related issues were apparent, i.e. OHS front suspension rubber bushes would require replacement prior to attempting another MOT.
Time to Make a Start
Following much deliberation and a full weeks (evenings only) evaluation I decided to take the ‘bull by the horns’ so to speak and take the plunge. I knew that I would never be happy to live with such a restrictive ground clearance therefore a alloy RS2000 sump would be required, In order to fit this, it would necessitate the engine being removed. I decided therefore to take the car off the road throughout the month of march and pull the engine out for a sump change and general overhaul / refurbishment.


Pic. 8 & 9 - Car ready for engine and gear box removal - Its out and ready for modification
The Engine has had a general overhaul apart from the sump change I.e. gaskets, belts, rubbers etc Clutch checked, big end bearings, oil pump etc etc etc all found to be ok. Decided not to break the head as following inspection via inlet/exhaust apertures looked Ok. Inlet and exhaust valve clearances reset and interestingly found that at some stage the engine had been fitted with a Piper reground Camtec fast road cam BP270. While the engine and gearbox were out it provided me the opportunity to inspect and refurbish not only the engine ancillaries, but also de rust and recoat the chasses, I decided a couple of coats of black hammerite metal paint would do the job.
Now my attentions turned to rectifying my exhaust problem. I was lucky enough to source a second hand 2001 Westfield zetec stainless side pipe with heat guard. The car was already fitted with a serria 4 into 2 cast manifold which I decided to keep in order to keep cost down, and with the help of some Jetex pipe fittings for approximately £100 in total ‘I had a side exhaust system‘.


Pic. 10 & 11 - Side Pipe fitted but now requires polishing - Simple tidy engine bay pipe run (yes I know, it’s a refurbished RS2000 sump, that’s why its wielded)
Now having resolved the ground clearance issue and got a nice looking side mounted exhaust pipe in the process, my attentions turned to finishing off the engine bay, as a previous owner had at some stage painted much of the engine my good lady encouraged me to freshen up the colour scheme. What the lady wants the lady gets. So even the engine got painted.

Pic. 12 - The finished engine bay in all its glory (my god that was a lot of work for something that spends most of its time hidden)
Well its now back in and following a full carburettor strip down, new seals / gaskets, jet clean, floats etc its running again. I have to confess having done a degree of work on the engine during removal, I did run the engine prior to refurbishing the carburettor. I suppose with age, a degree of caution creeps in.
Now fit the refurbished, polished wheels, tread with new soft track day ’road legal’ tyres and were off to do a shake down. ‘The smell of drying heat resistant paint is terrible’ anyway short trips with plenty of tools are the order of the day. After 20 miles or so and a visit to the garage for tyre pressure and wheel tighten check the general clutch and throttle adjustment are on the list. Due to the engine position change the gear stick is now fouling on the hand break lever and the general driving position needs addressing. But overall no major problems, and to cap it all the ground clearance has now been raised from 1.25 inches to a very respectful 4 inches, and the new side pipe looks and sounds great.
Well its now the Easter bank holiday and what a glorious weekend it is, unfortunately the only downside to this, from the restoration point of view, is that its to good a weather not to be out driving and enjoying the car so I’m afraid that not that much is going to truly get done, as I had planned to strip out the interior and dash and proceed on the bases of minimalism, ’if not required get rid of as just more to go wrong’
Now ! This has been a weekend to remember the interior still needs doing, the list of work is as ever daunting, ‘will there ever be any light at the end of this tunnel’ the interior needed finishing ( wiring, carpeting layout ) the boot wiring I had not even started, and to top it all during the shake down runs I have developed a oil leak from the auxiliary drive shaft, trust this to be the one of the only seals I did not change while having the engine out.
Time to stop moaning and get on with the job. First strip the dash, remove the centre console, very 80’s, half the lights and dials aren’t connected anyway. Reposition ignition key, hazard light switch and make sure every thing works and is cleanly wired. While I was busy working upside down on my back with my head under the dash, the good lady had been busy on the sewing machine hemming a new set of foot well and tunnel carpets.


Pic. - 13 & 14 The during rip out and the finished article
The dash was now starting to take shape, and the space gained from removing the centre console could now be used to fit a Radio/CD player (even if you can’t here it its always great to have some music, especially a problem for the driver of a pinto with a side pipe).
For a change its all going to plan Saturday sees the majority of the interior completed, leaving Sunday free to tackle the problem of the oil leak and cleanup the boot electrics including the fitment of a inertia switch for the electric fuel pump (safety first), curtsey of the local scrap yard for a fiver. One last luxury was the fitment of a ‘bran new’ Aldon Ignitor electronic ignition unit. I was persuaded to make the investment as not only were my distributor lobs badly warn from the continual changing of points, but from a economy and tune stability point of view. What’s the point of paying to have the car tuned / set up for it to fallout a week later.
Saturday the 21st May 10.15am and ‘judgement day‘. The car is booked in to A. B. Garage in Chester to be rolling road tuned / setup and while I have been looking forward to the day for some time I must confess to being somewhat apprehensive ‘what if the engine goes pop’


Pic. 15 & 16 - In to the Lions Den and The Day of Reckoning
Well the experience was certainly one of which will stay with me for many a year to come. A.B. Garage had been recommended to me by the owner of Chester Sports Cars - ‘Tiger Kit Car Specialists’ and while initially, primarily based on the look of the place, I questioned weather I had made a mistake. I was soon put at ease, it was very much like going back in time, before all the politically correct health and safety do-gooders had take over. It quickly became apparent that these two individuals had not only all the necessary tools and equipment but without doubt the knowledge skills and passion to build, modify and tune competitive racing cars.
My confidence on a high, throughout the 4 hour test, I was allowed to participate very much as a student through every step of the process, this in itself I would have paid for.
Due to the age of the engine and that I intended its use to be road rather than track (poss. a bit of hill climb) we keep the RPM below 6000 and went about producing a drivable sports car. Along the way there were one or two apprehensive moments and apart from some high quality leads and replacement jets the job was done with no major problems, and I left clutching the evidence of our labours in the form of an A4 piece of paper depicting a BHP and LB FT profiles, and a far smoother and livelier car to boot. (‘that Subaru driver didn’t know what hit him on the way home’)
This will have to do for Phase 1 of the Restoration as its time to get it to Stoneleigh

The Car so far in all its glory


